Thursday 25 October 2018

Guide to prepare for AngelList code quiz


As you know AngelList is a great resource if you are looking to find a job in a startup. Unlike other social platforms, only startups post a job on AngelList. So if you are looking to work with a startup and haven’t already created a profile then go to https://angel.co/ and start exploring. Creating a profile is fairly simple and you can search for jobs by location, role, technology, market and salary. Moreover, if you have a good profile and made your profile visible to startups then there’s a good chance that company might contact you. If you have just graduated and looking for a job then AngelList offers you to showcase yourself by taking a code quiz.

I will tell you about my experience taking the code quiz and also give you few tips about how to prepare for the same. It is very important that you take the code quiz very seriously since you are only allowed to take it once.

The quiz features 14 multiple choice questions with a time limit of 2 minutes per question. If you have prepared well, it should not take you more than 15-20 minutes to complete the quiz. The questions are fairly simple and they are just meant to test your basic programming skills so you can prepare for the quiz in a programming language of your choice. The quiz tests your ability to read and understand code, logical thinking and some debugging. The type of questions that the quiz covers includes basic knowledge of data type, function tracing (you will be given a code snippet and need to guess the output of a variable), data structures (Stack, Queue, Tree, Set, Array, Linked List) and algorithms (Sorting) and run time complexity. If you have an understanding of all the above topics then you will finish the test in no time and with good result.

Good Luck!

Monday 22 October 2018

How to use macOS widget on your website


We all know that macOS has some very nice and useful widgets. In this post, I’ll show you how to use these widgets on your website.
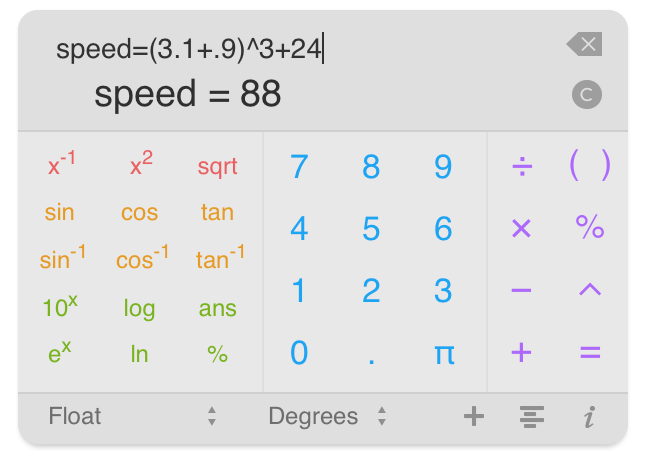
We’re going to use a calculator widget for OS X provided by Donkeyneering. The name of this widget is PEMDAS. It is a simple calculator widget that also lets you work with equations, variables, different bases and many other functions. The widget looks like this:
The basic idea is that we will download this widget and edit the HTML file. Our HTML page will have a button and when the user clicks on a button; our widget will be shown. Then we will make this widget draggable and finally press the button again so that the user can close it when finished using the widget.
Let’s get started.
Download the widget from this link. http://www.donkeyengineering.com/pemdaswidget/
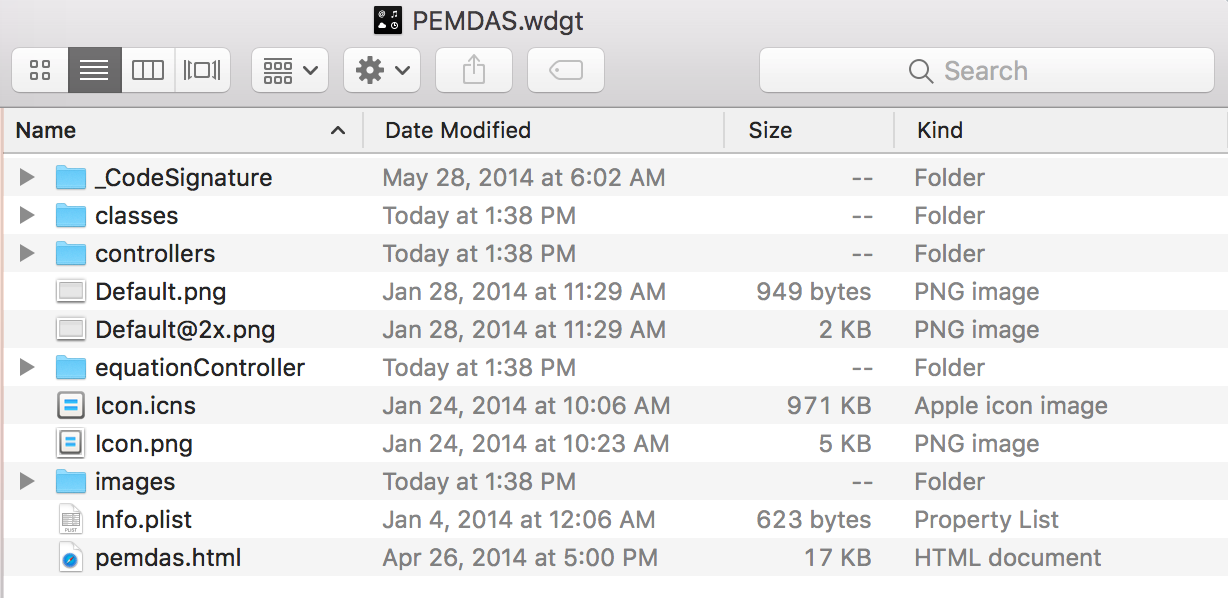
The widget will be downloaded in zip format. Please unzip it and you will be left with the widget file with .wdgt extension. Right click on this file and select show package contents. You will see the following files inside the widget.
These files basically contain bunch of JavaScript files, CSS file, images and an HTML file. You will get to see the widget in action if you open up the pemdas.html file. When you open the html file in a browser; you will just see the calculator widget.
We will edit this HTML file so that the widget gets shown/ hidden by pressing a button and also make it draggable so that it does not overlap any other elements present on your webpage.
Open the pemdas.html file in the code editor of your choice.

You will see all the Classes and Controller files written in JavaScript to implement this calculator widget in the head section. The head section also imports a CSS file that styles the calculator.
Let’s go ahead and add a button to this page. We will code in such a way that when user loads this html page; only the button should be shown. And when the user clicks on that button our calculator widget will get shown. We will write some JavaScript to show/ hide this widget on button click. Finally, we will use some jQuery to make this widget draggable.
The changes in the code is as follows:

As you can see above, we have added jQuery library so that we can use draggable method to make our widget draggable. Inside the body we have added a button with the value ‘Show calculator’ and written script for the same. Notice that the display is changed to none so that the calculator does not get shown by default. The script compares the display and if it is none then it changes to block and our calculator will be shown. Also, the button value changes to ‘Hide Calculator’.
We have then implemented the jQuery draggable method to make our calculator widget move within the window. Notice that div with id inputForClipboardCopy has been removed. Please make the above changes to your code and you will get to see the final output below.
You can find the full code for this blog post here.