We all know that macOS has some very nice and useful widgets. In this post, I’ll show you how to use these widgets on your website.
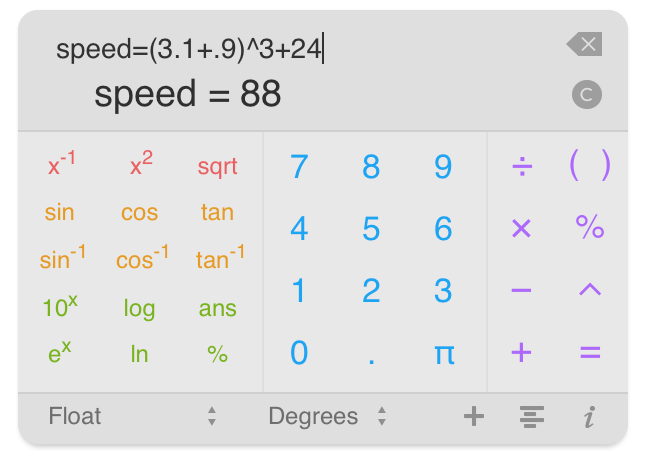
We’re going to use a calculator widget for OS X provided by Donkeyneering. The name of this widget is PEMDAS. It is a simple calculator widget that also lets you work with equations, variables, different bases and many other functions. The widget looks like this:
The basic idea is that we will download this widget and edit the HTML file. Our HTML page will have a button and when the user clicks on a button; our widget will be shown. Then we will make this widget draggable and finally press the button again so that the user can close it when finished using the widget.
Let’s get started.
Download the widget from this link. http://www.donkeyengineering.com/pemdaswidget/
The widget will be downloaded in zip format. Please unzip it and you will be left with the widget file with .wdgt extension. Right click on this file and select show package contents. You will see the following files inside the widget.
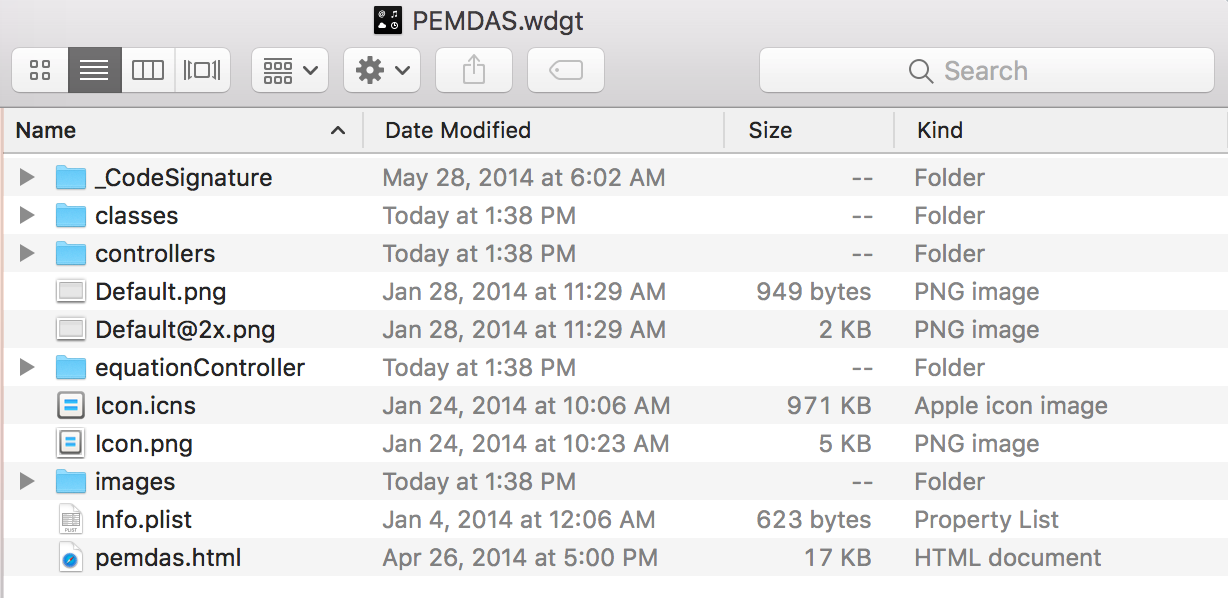
These files basically contain bunch of JavaScript files, CSS file, images and an HTML file. You will get to see the widget in action if you open up the pemdas.html file. When you open the html file in a browser; you will just see the calculator widget.
We will edit this HTML file so that the widget gets shown/ hidden by pressing a button and also make it draggable so that it does not overlap any other elements present on your webpage.
Open the pemdas.html file in the code editor of your choice.
You will see all the Classes and Controller files written in JavaScript to implement this calculator widget in the head section. The head section also imports a CSS file that styles the calculator.
Let’s go ahead and add a button to this page. We will code in such a way that when user loads this html page; only the button should be shown. And when the user clicks on that button our calculator widget will get shown. We will write some JavaScript to show/ hide this widget on button click. Finally, we will use some jQuery to make this widget draggable.
The changes in the code is as follows:
As you can see above, we have added jQuery library so that we can use draggable method to make our widget draggable. Inside the body we have added a button with the value ‘Show calculator’ and written script for the same. Notice that the display is changed to none so that the calculator does not get shown by default. The script compares the display and if it is none then it changes to block and our calculator will be shown. Also, the button value changes to ‘Hide Calculator’.
We have then implemented the jQuery draggable method to make our calculator widget move within the window. Notice that div with id inputForClipboardCopy has been removed. Please make the above changes to your code and you will get to see the final output below.

No comments:
Post a Comment